Requires:
- Joomla! 1.5.04 or greater
- PHP 5.2.x
- cURL (included in most PHP configurations)
- OpenSSL (included in most PHP configurations)
Upgrade
IMPORTANT: Starting with version 2.25 for Joomla 1.6 - 2.5 (filename: Joomla_1.6-2.5_pkg_nicetweets_v2.25.zip), you no longer need to uninstall your previous version of the Nice Tweets extension before upgrading. Simply install the extension using Joomla's native installer and your installation of the extension will automatically be upgraded. As a precaution, you still need to make a backup of your site's files and database before upgrading. Other than backing up, no special steps are required to upgrade your site.
Getting Started
1. If you don't already have one, sign up for a Twitter account.
2. Install the extension using Joomla's Extension Manager
(http://docs.joomla.org/How_do_you_install_an_extension%3F).
Make sure that you use the version of Nice Tweets that corresponds with your Joomla version.
3. Go to Extensions>>Plugin Manager and click into the plugin “System – Nice Article Tweets”.
4. Enable the Nice Article Tweets Plugin

These next few steps are a bit outside the normal Joomla extension installation experience. They are required in order to comply with Twitter's OAuth security protocol. These steps should be straight forward and easy to follow. If for any reason you have difficulty with the installation at any point please visit our support forum for help, http://trinitronic.com/supportforum/index.php
5. Go to dev.twitter.com, make sure you are signed out of Twitter and click on "Create an app" 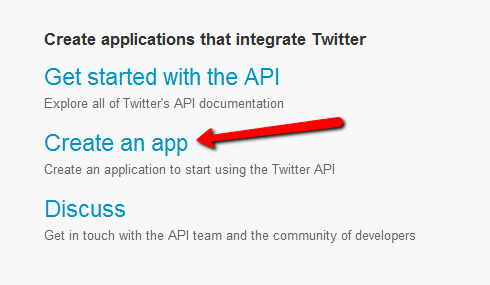
6. Log-in with your preferred twitter account credentials. The Nice Tweets extension registration will be associated with this account. 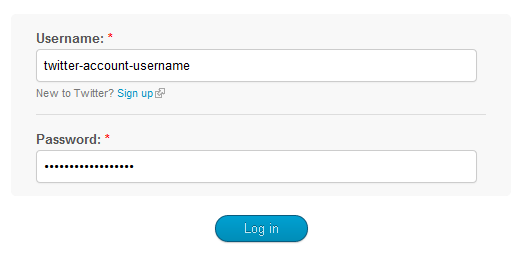
7. Fill in the application registration form and the submit button. 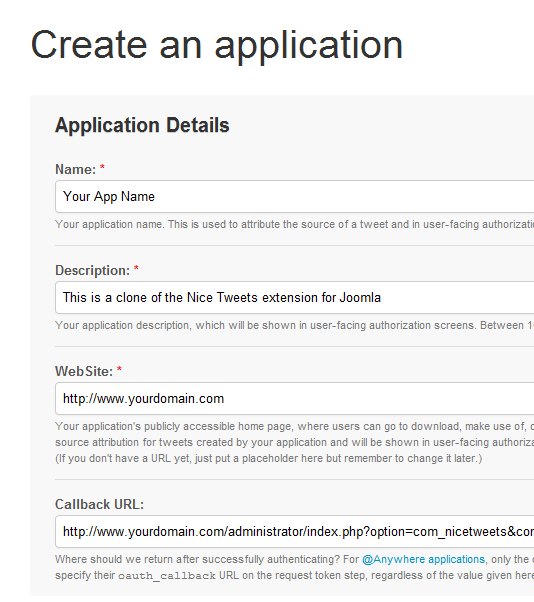
- You will need to create a unique application name for the extension. Do not use "Nice Tweets" as this name has already been taken by us.
- In the description field, if you don't know what to enter, type something like "A Nice Tweets clone."
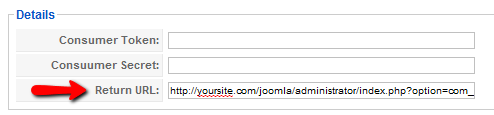
- For Callback URL, open another browser window and navigate to your Joomla site Admin>>Nice Tweets>>Settings. Copy the entire URL that is show in the "Return URL" field and paste into the twitter application form field. Note, leave the Nice Tweets' Setting page open, you're going to need it again shortly.
For reference please note that the callback URL will follow this syntax:
http://www.yourdomain.com/administrator/index.php?option=com_nicetweets&controller=Accounts&task=twitback
- Click the "Register application" button at the bottom of the page when you are finished filling out the form.
8. Once you have save the application form, scroll to the bottom of the application details page. You will see the sub-title "Your access token". Click on the button labeled "Create my access token."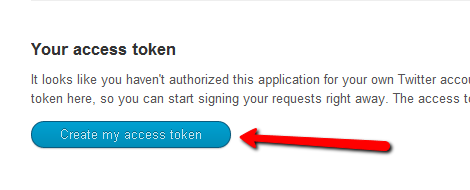
This process will take Twitter a few minutes and you may not see any changes to your details page for a bit. But eventually you will see that access tokens have been added under the subtitle "Your access token."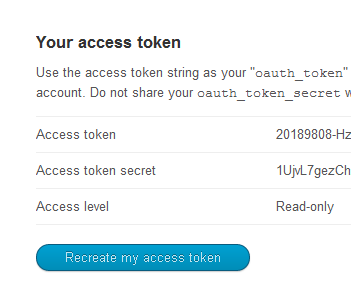
9. Now it is time to change the application's access level permissions. You may have noticed that up until now the application details page has listed the access level as "Read only." You need to change this to "Read and Write." Scroll to the top of the page and click on the "Settings" tab.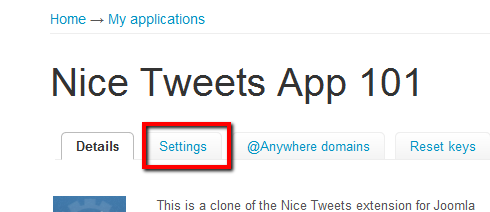
Once on the Settings tab page find the subheading "Application Type." Tick the radio button for "Read and Write." Scroll to the bottom of the page and click the update settings button. It may take a few minutes for the settings to update properly.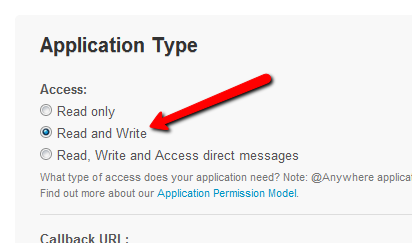
10. Click back to the "Details" tab. Find the line items "Consumer Key" and "Consumer Secret" On your newly created twitter application page. Copy these two numbers and paste them into the corresponding fields on your Joomla site's Nice Tweets Settings page and click the Save button.
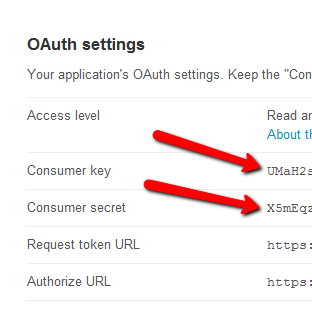
Note, that in the Nice Tweets Settings page, we call the Consumer Key the Consumer Token.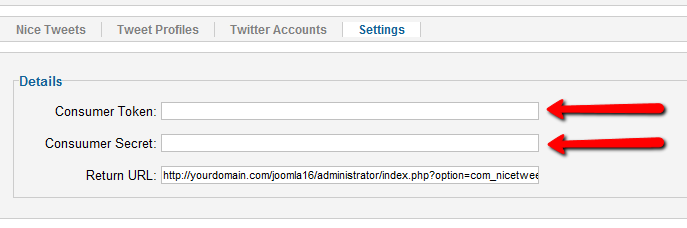
Now we need to authorize Nice Tweets to post tweets for your desired twitter account.
11. Make sure you are logged out of twitter.
12. Navigate to Joomla Admin>>Nice Tweets>>Twitter Accounts and click the "New" button.
13. You will be taken to Twitter's application authorization page. Log in using the credentials of the Twitter account you wish to allow Nice Tweets to use. Follow Twitters on screen instructions. After you have authorized the application, you will be taken back to your Admin>>Nice Tweets>>Twitter Accounts page. 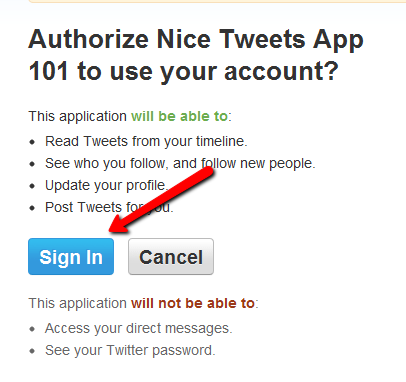
Be patient, it takes a few minutes for the newly authorized account to appear in the list of accounts.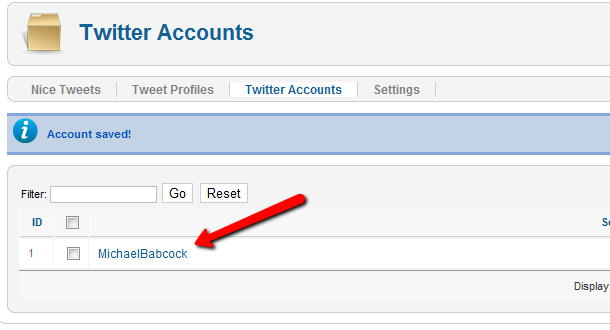
Ok, we are pretty much finished with the set up. We only have one more thing to do and that is to set up a Tweet Profile. Tweet profiles tell Nice Tweets when, where, what and how to tweet to twitter.
14. Navigate to Joomla Admin>>Nice Tweets>>Tweet Profiles and click new. Fill in the form as desired.
- Profile name - create a memorable name to that makes it easy for you to identify the profile.
- Profile Enabled - true.
- Twitter Account to Use - select the account you want the profile to send tweets to.
- Send Tweets - Select automatically or manually. Manually will log the tweets in Nice Tweets history where you will be able to send the tweet when you want instead of when the Joomla article is saved.
- Optionally, set a New Article Prefix, example: "New -". Leave blank to omit.
- Optionally, set Tweet on Update to post tweets for updated articles by selecting the "Yes" radio button.
- Optionally, set an updated Article Prefix, example: "Updated -". Leave blank to omit.
- Set Include link to yes or no. "Yes" will send the tweet with a link to your article and "No" will send the tweet without a link to your article.
- Set your preference for URL link shortening.
- Leave Include Sections blank to include all sections. Otherwise list the ids of the sections you want to include separated by commas. Example: 3,4,12,48. Note, do not enter any spaces or white space between the id numbers.
- Leave Include Categories blank to include all categories. Otherwise list the ids of the categories you want to include separated by commas. Example: 3,4,12,48. Note, do not enter any spaces or white space between the id numbers.
- Leave Include Users to create tweets for anyone who authors an article. Otherwise list the ids of the users you want to include separated by commas. Example: 3,4,12,48. Note, do not enter any spaces or white space between the id numbers.
When your finished filling in your preferences for the Nice Tweets Profile click save.
Now your ready to go, Nice Tweets will take care of the rest for you. Enjoy your new Nice Tweets extension!